How to host a Christmas dinner party - pallet picnic style!

 I love the mood of a picnic style dinner party - it's relaxed, casual and the perfect setting for conversations. These picnics are so perfect when done outdoors in backyards and in parks, as well as indoors! Whilst it seems like a lot goes into creating such a dinner setting (which I guess is somewhat true!), it's also not as difficult as it looks. Today, I'm putting together post to share just how easy it is to set up your own bohemian inspired pallet picnic style dinner party - the perfect way to entertain this Christmas.
Step 1 - furnish the space
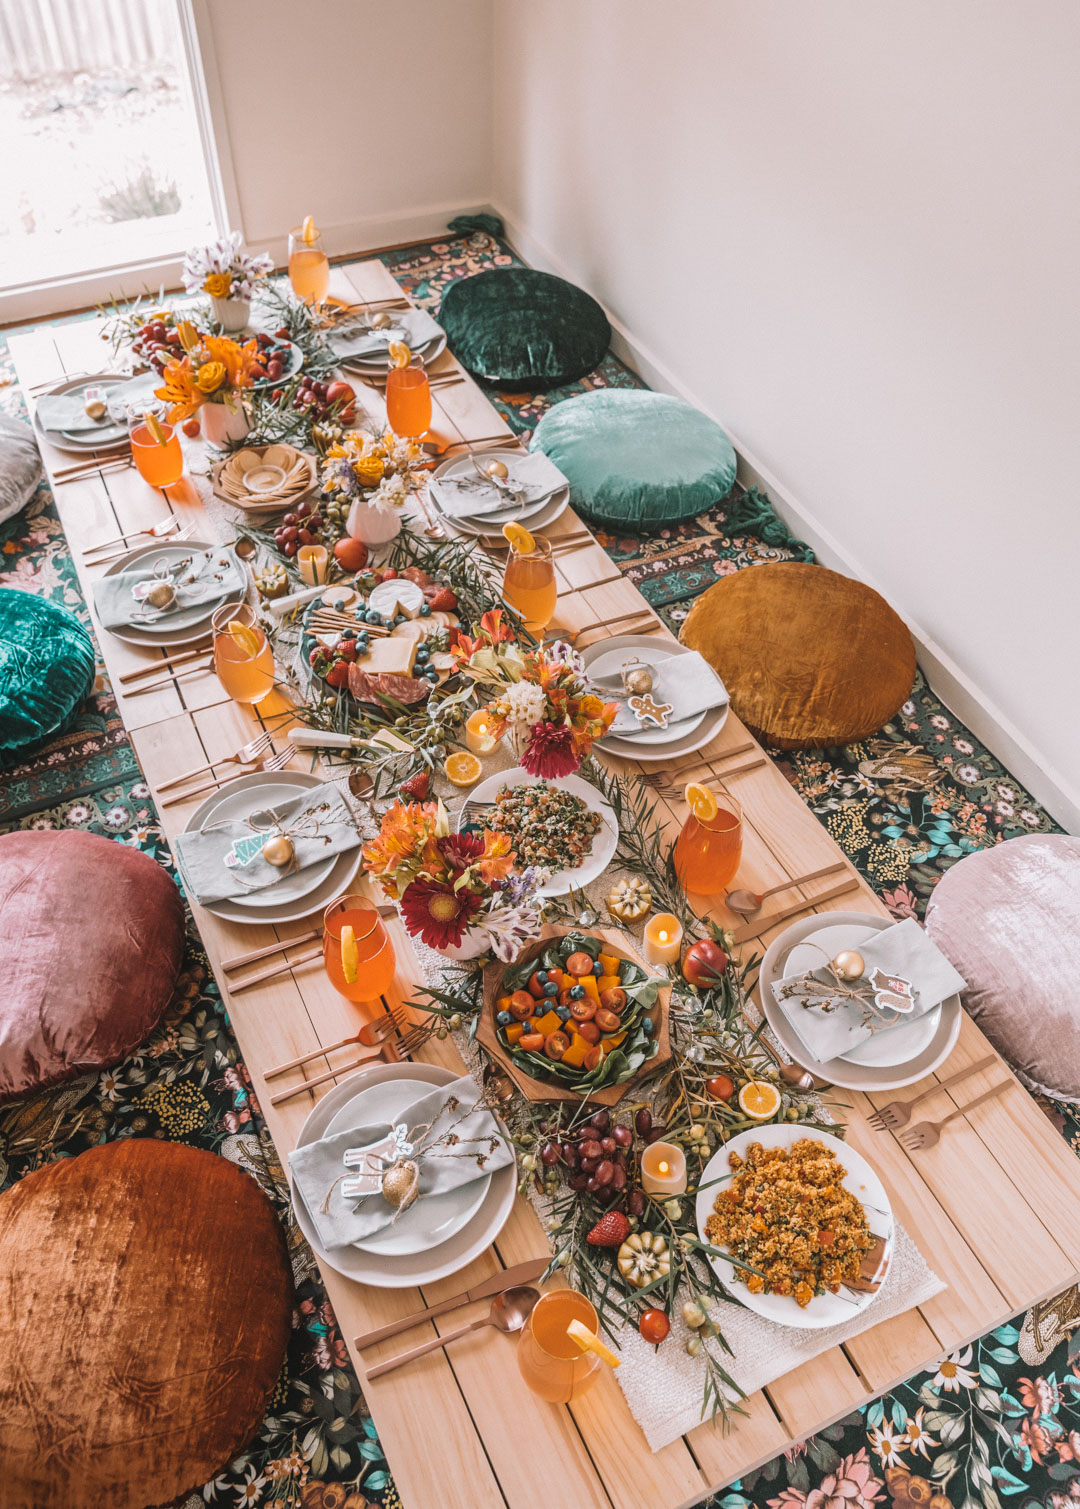
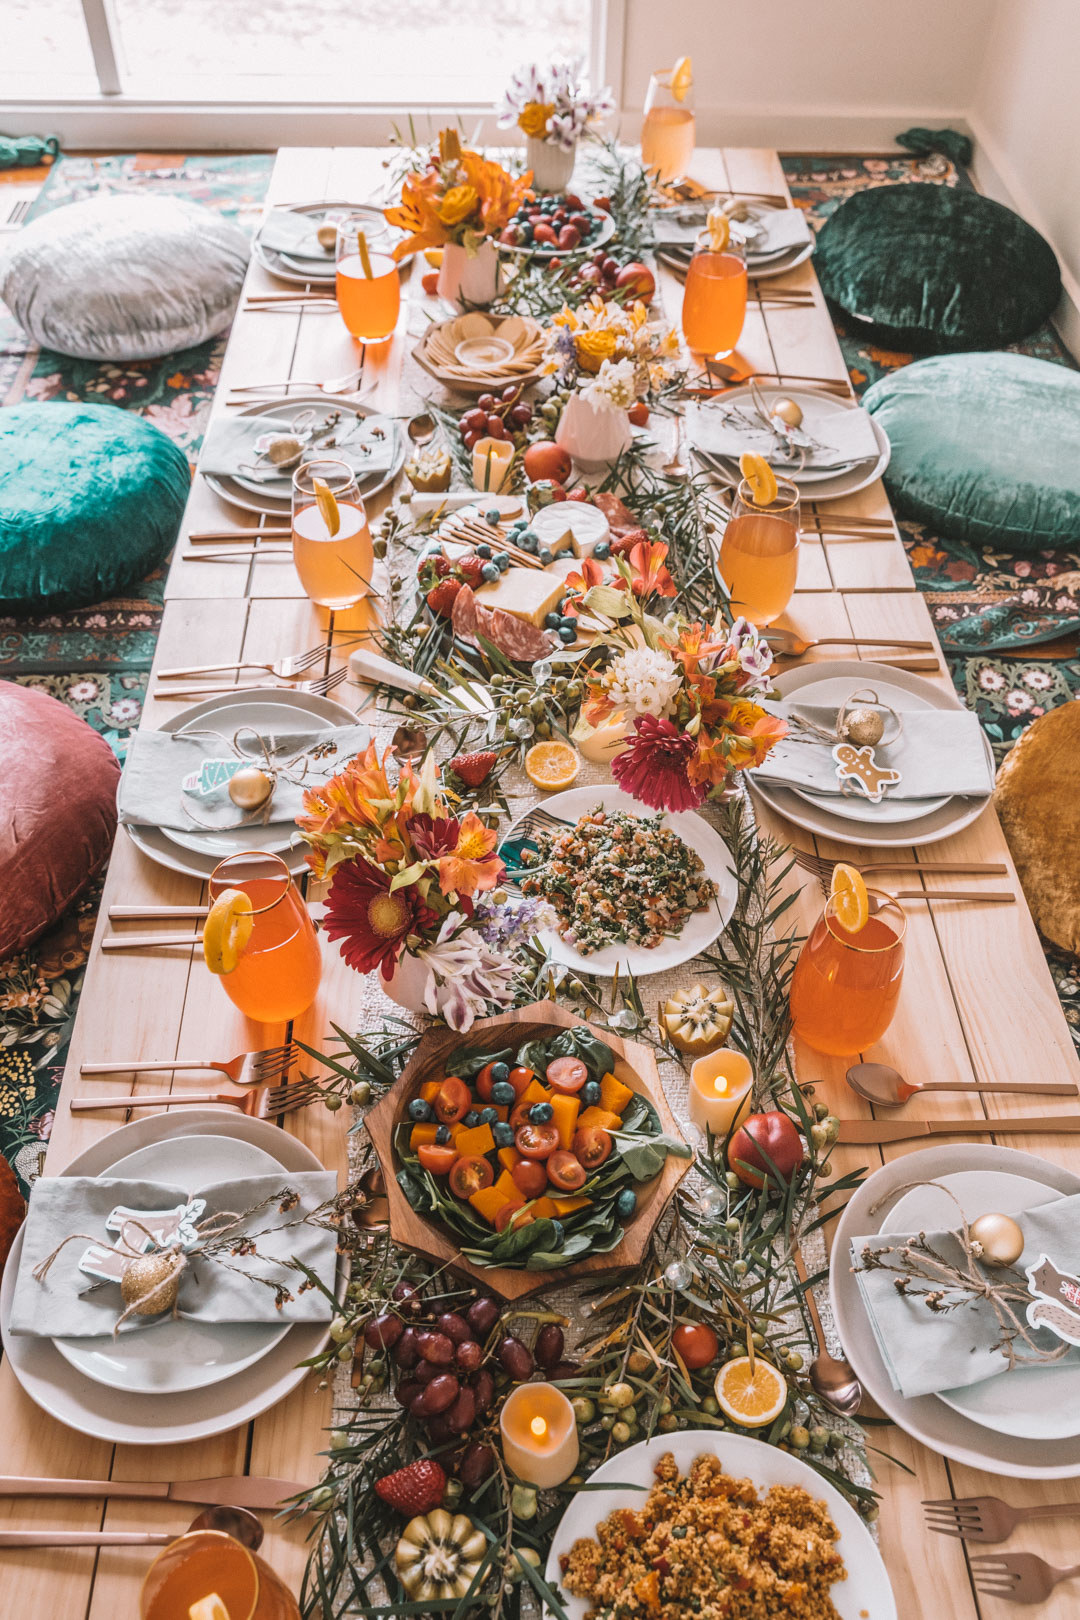
 Gather your 'furniture'.To create this setting, you will need a few large picnic rugs or outdoor rugs. Here I used my two Wandering Folk picnic rugs (I have the emerald forest one on the left, and the native wildflower one on the right). As I'm doing it indoors, I have a smaller space than I'd like so if you have more space, you could use 3-4 rugs for an even more roomier spread.Once you lay out your rugs, you can add in your pallet tables. Pallets can be picked up free or for a small price from browsing sites like Gumtree. But I really struggled to find a pallet that had smaller gaps between the planks, so decided to make my own instead (tutorial coming next!).Add in plenty of cushions for seating. These velvet pretties are from west elm here.
Step 2 - creating the place setting
[gallery columns="2" link="none" ids="17994,17995"] Lay out your place settings. When it comes to ambience, the fancier the better! Here I've layered a warm rose dinner plate with a smaller salad plate on top - I love how the edges of these plates are slightly uneven - it gives a real rustic kind of look. I've gone full force with a complete set of rose gold cutlery and gold rimmed glasses, both from west elm.When it comes to a Christmas party, I love to dress up the napkins with decorations. All you need is a sprig of greenery, a festive decoration, ribbon and something to use as a name card. This little napkin look that I created is really easy to replicate. Here, I used twine ribbon (available at craft shops) and I tied in some dried native wildflowers and a mini bauble I found in my local grocery store. The little cut out festive cards are from an old kikki.K Christmas themed paper lover's book - and I've placed them on top to use as name cards.
Step 3 - styling the table centre
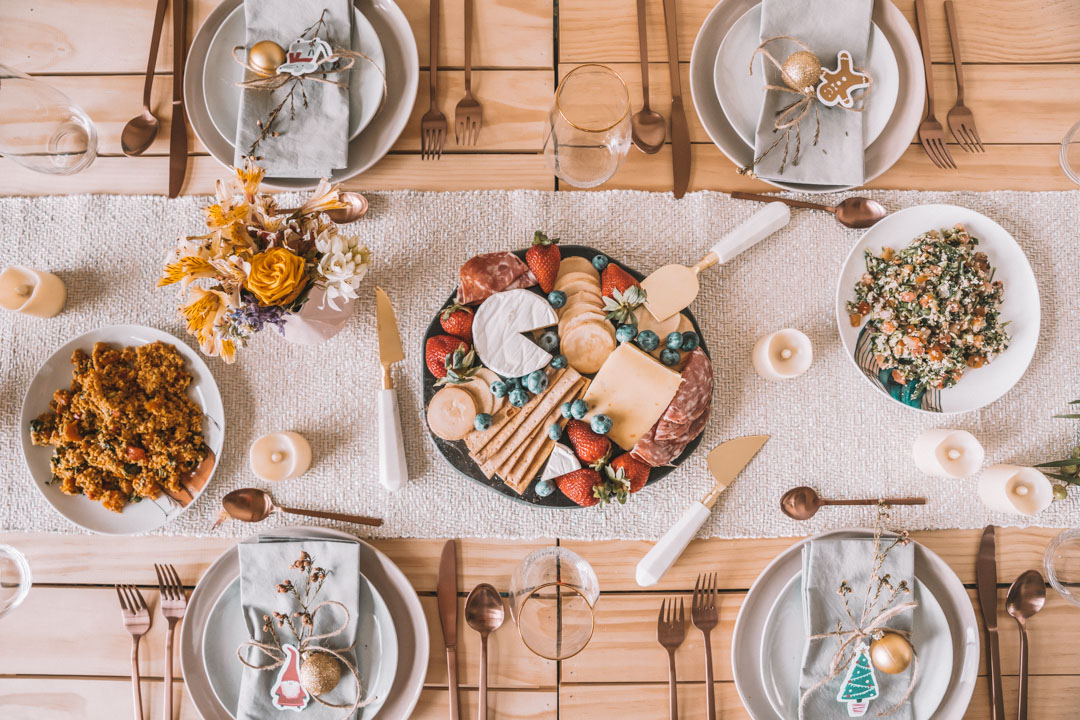
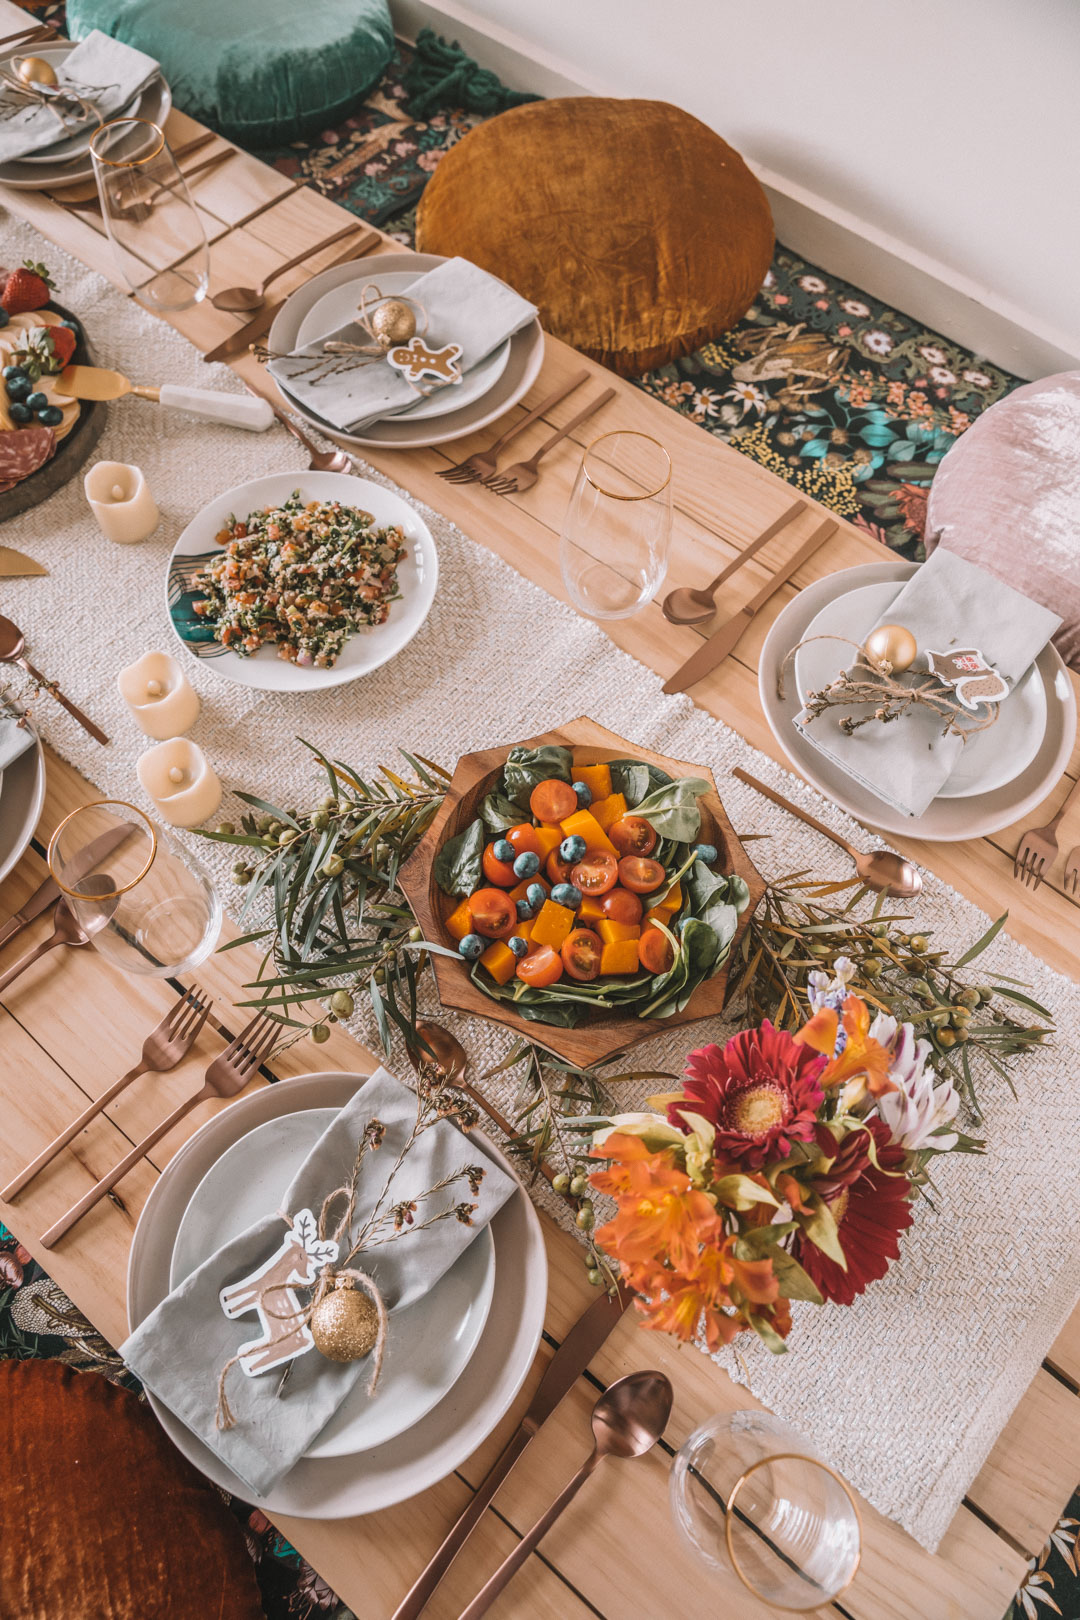 servingware, candles & pink vases from west elm
For this particular look, I've used grazing platters for inspiration to create a busy centrepiece where large dishes are framed by all sorts of fruits and greenery.One thing that changes the look of a table setting completely is a nice table runner. It really elevates a table setting from a regular dinner to a special dinner. Start by laying out a table runner. Then add your large dishes, alternating colours/plates to create a varied look. Scatter decor items such as flower vases and candles around these dishes. Once all the main items are on the table, it's time to decorate and fill in the gaps!I used some native greenery I found in my garden to create the backdrop for this table spread. Using small branches, place these around the table, tucking in the branches beneath plates. Fill in the gaps with pops of colour such as grapes, strawberries, kiwis, nectarines and lemons. You can also add little fairy lights too. Make the table decoration interactive by being edible! Don't double think it, just place how it feels right. Once done, it will all come together into a beautiful festive look.


Outfit details: Spell Designs Lily Maxi dress | Bared Flicker Heels
And there you have it. A Christmas-ready dinner party spread. I can't wait to replicate this again and again over summer (yes, us Aussies have Christmas during summer!). Hope you enjoyed this post and find some inspiration to create your own pallet style picnic. I'll follow this post up shortly with a tutorial on how I created my picnic tables.