How to Install, Hang & Style Sheer Linen Curtains at Home
Hey guys! So I’m back here to rave about curtains. You might remember that a few months ago we added our first set of curtains to our home when I wrote about our guest bedroom transformation in this post over here. Well since then, I’ve been absolutely in love with how much those curtains have transformed the room and I’m back now to let you know that we’ve installed the same white sheer linen curtains onto the rest of the windows in our home. And they’re just incredible!
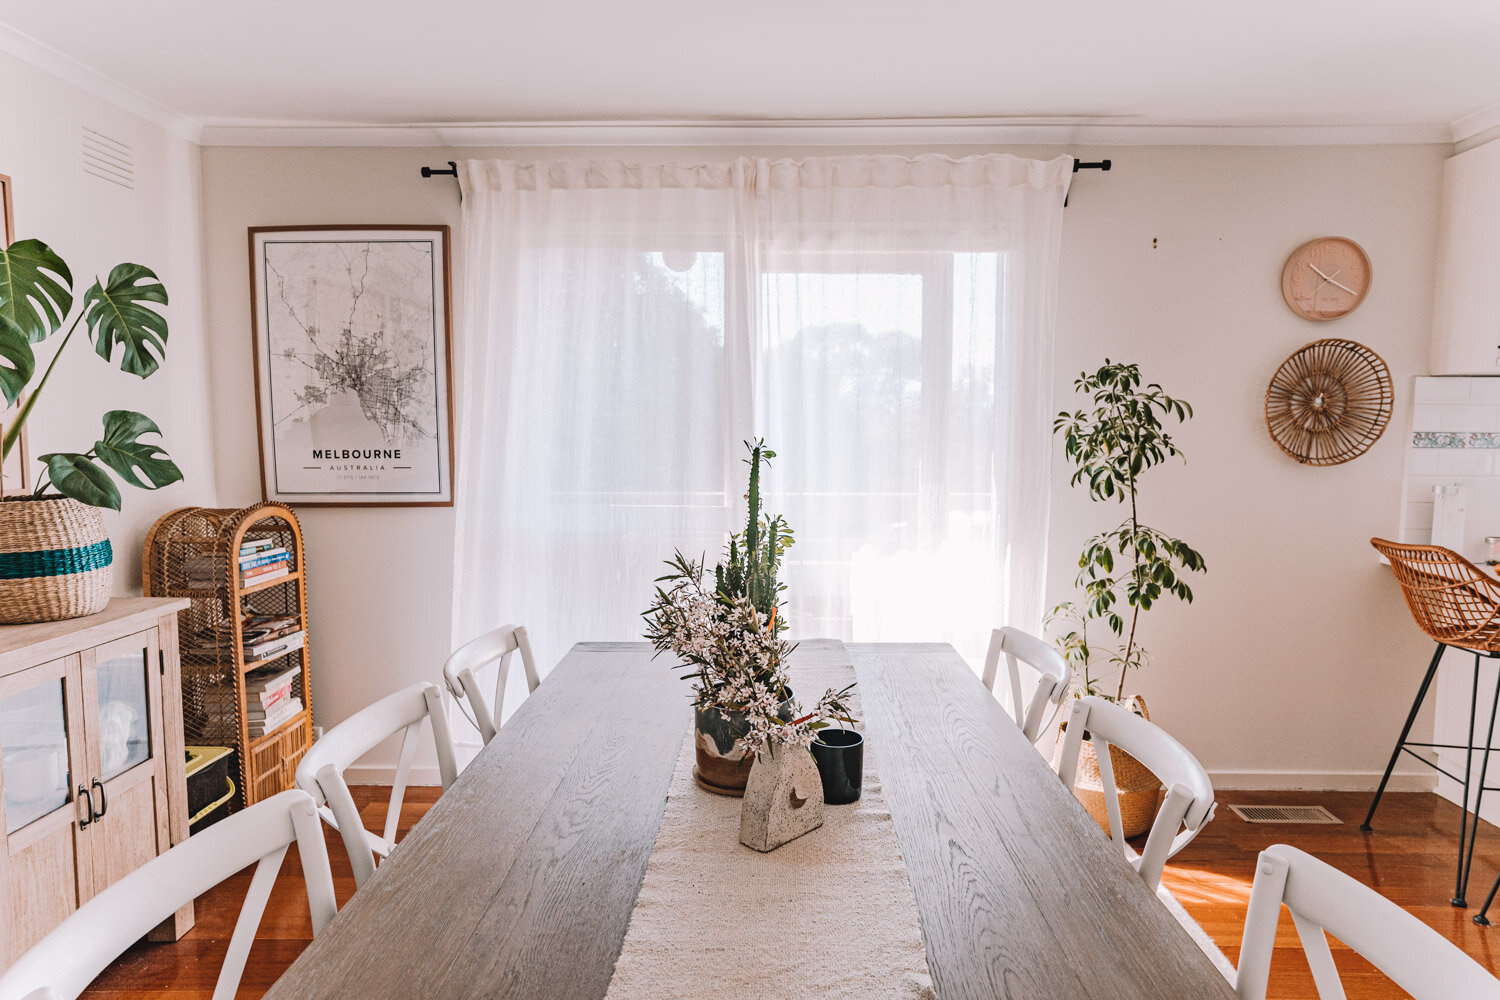
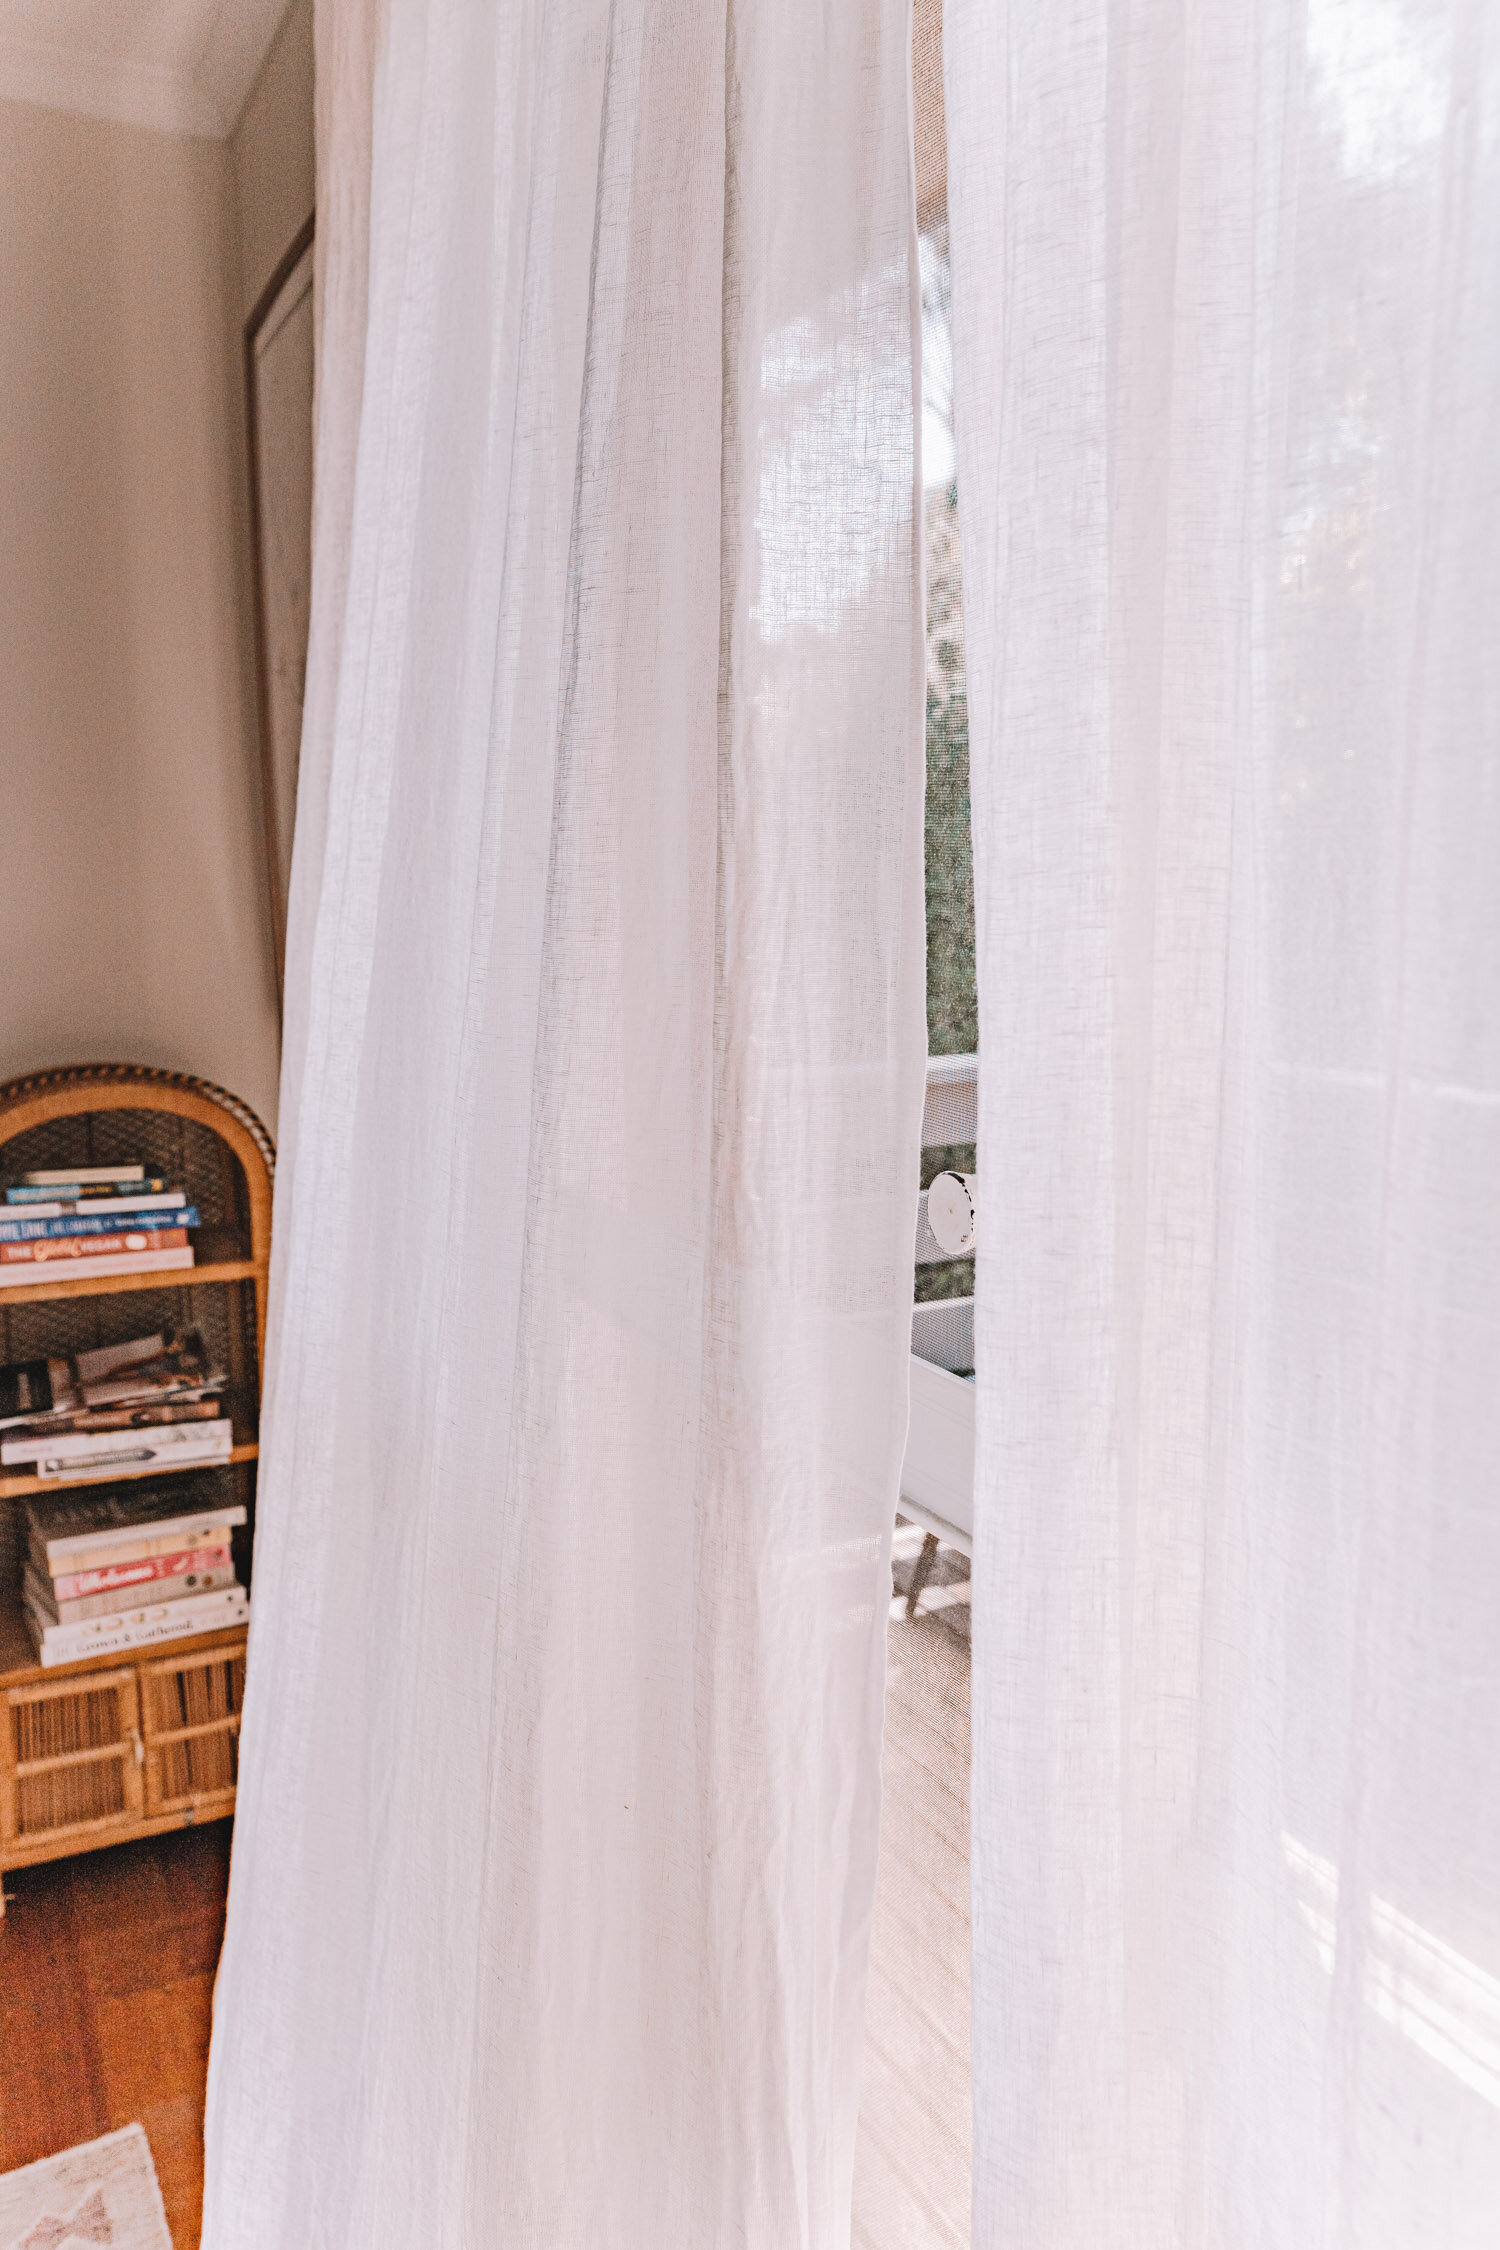
The elusive curtains I’m talking about are the IKEA LEJONGAP curtains, they’re the perfect amount of sheer that lets in beautifully diffused sunlight whilst providing amazing privacy during the day (I’ve checked the outside of the house, numerous times) and are 100% linen. Since documenting the installation process on IG stories, a number of you have already told me that you have gone ahead and purchased/installed these in your own homes as well, and it seems like I’m not the only one raving about them.

Today, I’m going to share with you everything you need to know about how to install these curtains in your own home, as well as pass on some tips that I learnt along the way. This is a project you can actually do on your own without any assistance from a second pair of hands - because I actually installed all six windows worth of curtains (& curtain rods) all on my own and I’m still completely shocked at how easy it was, compared to what I had originally thought. Turns out, it’s basically the same as hanging picture frames in a straight line.
So read on below, if you’re interested in finding out more!
BEFORE WE BEGIN:
ABOUT THE IKEA LEJONGAP CURTAINS
I always knew that I wanted to have sheer white linen curtains in our home but never knew where to begin to find them. They’re such a common-ish kind of look so the thought of having to trawl through so many different curtain brands was super overwhelming and I never got started. Then, one day, I randomly came across someone who said they got their sheer linen curtains from IKEA. I had no idea IKEA stocked these and after having a look, I found the LEJONGAP curtains - they were not just linen look, but 100% linen and were reasonably priced as well. After installing them in our guest bedroom, I was so pleased with how they looked and how much light they let in without being sheer from the outside, that I just knew they were the the ones for us.

CHOOSING THE CURTAIN ROD
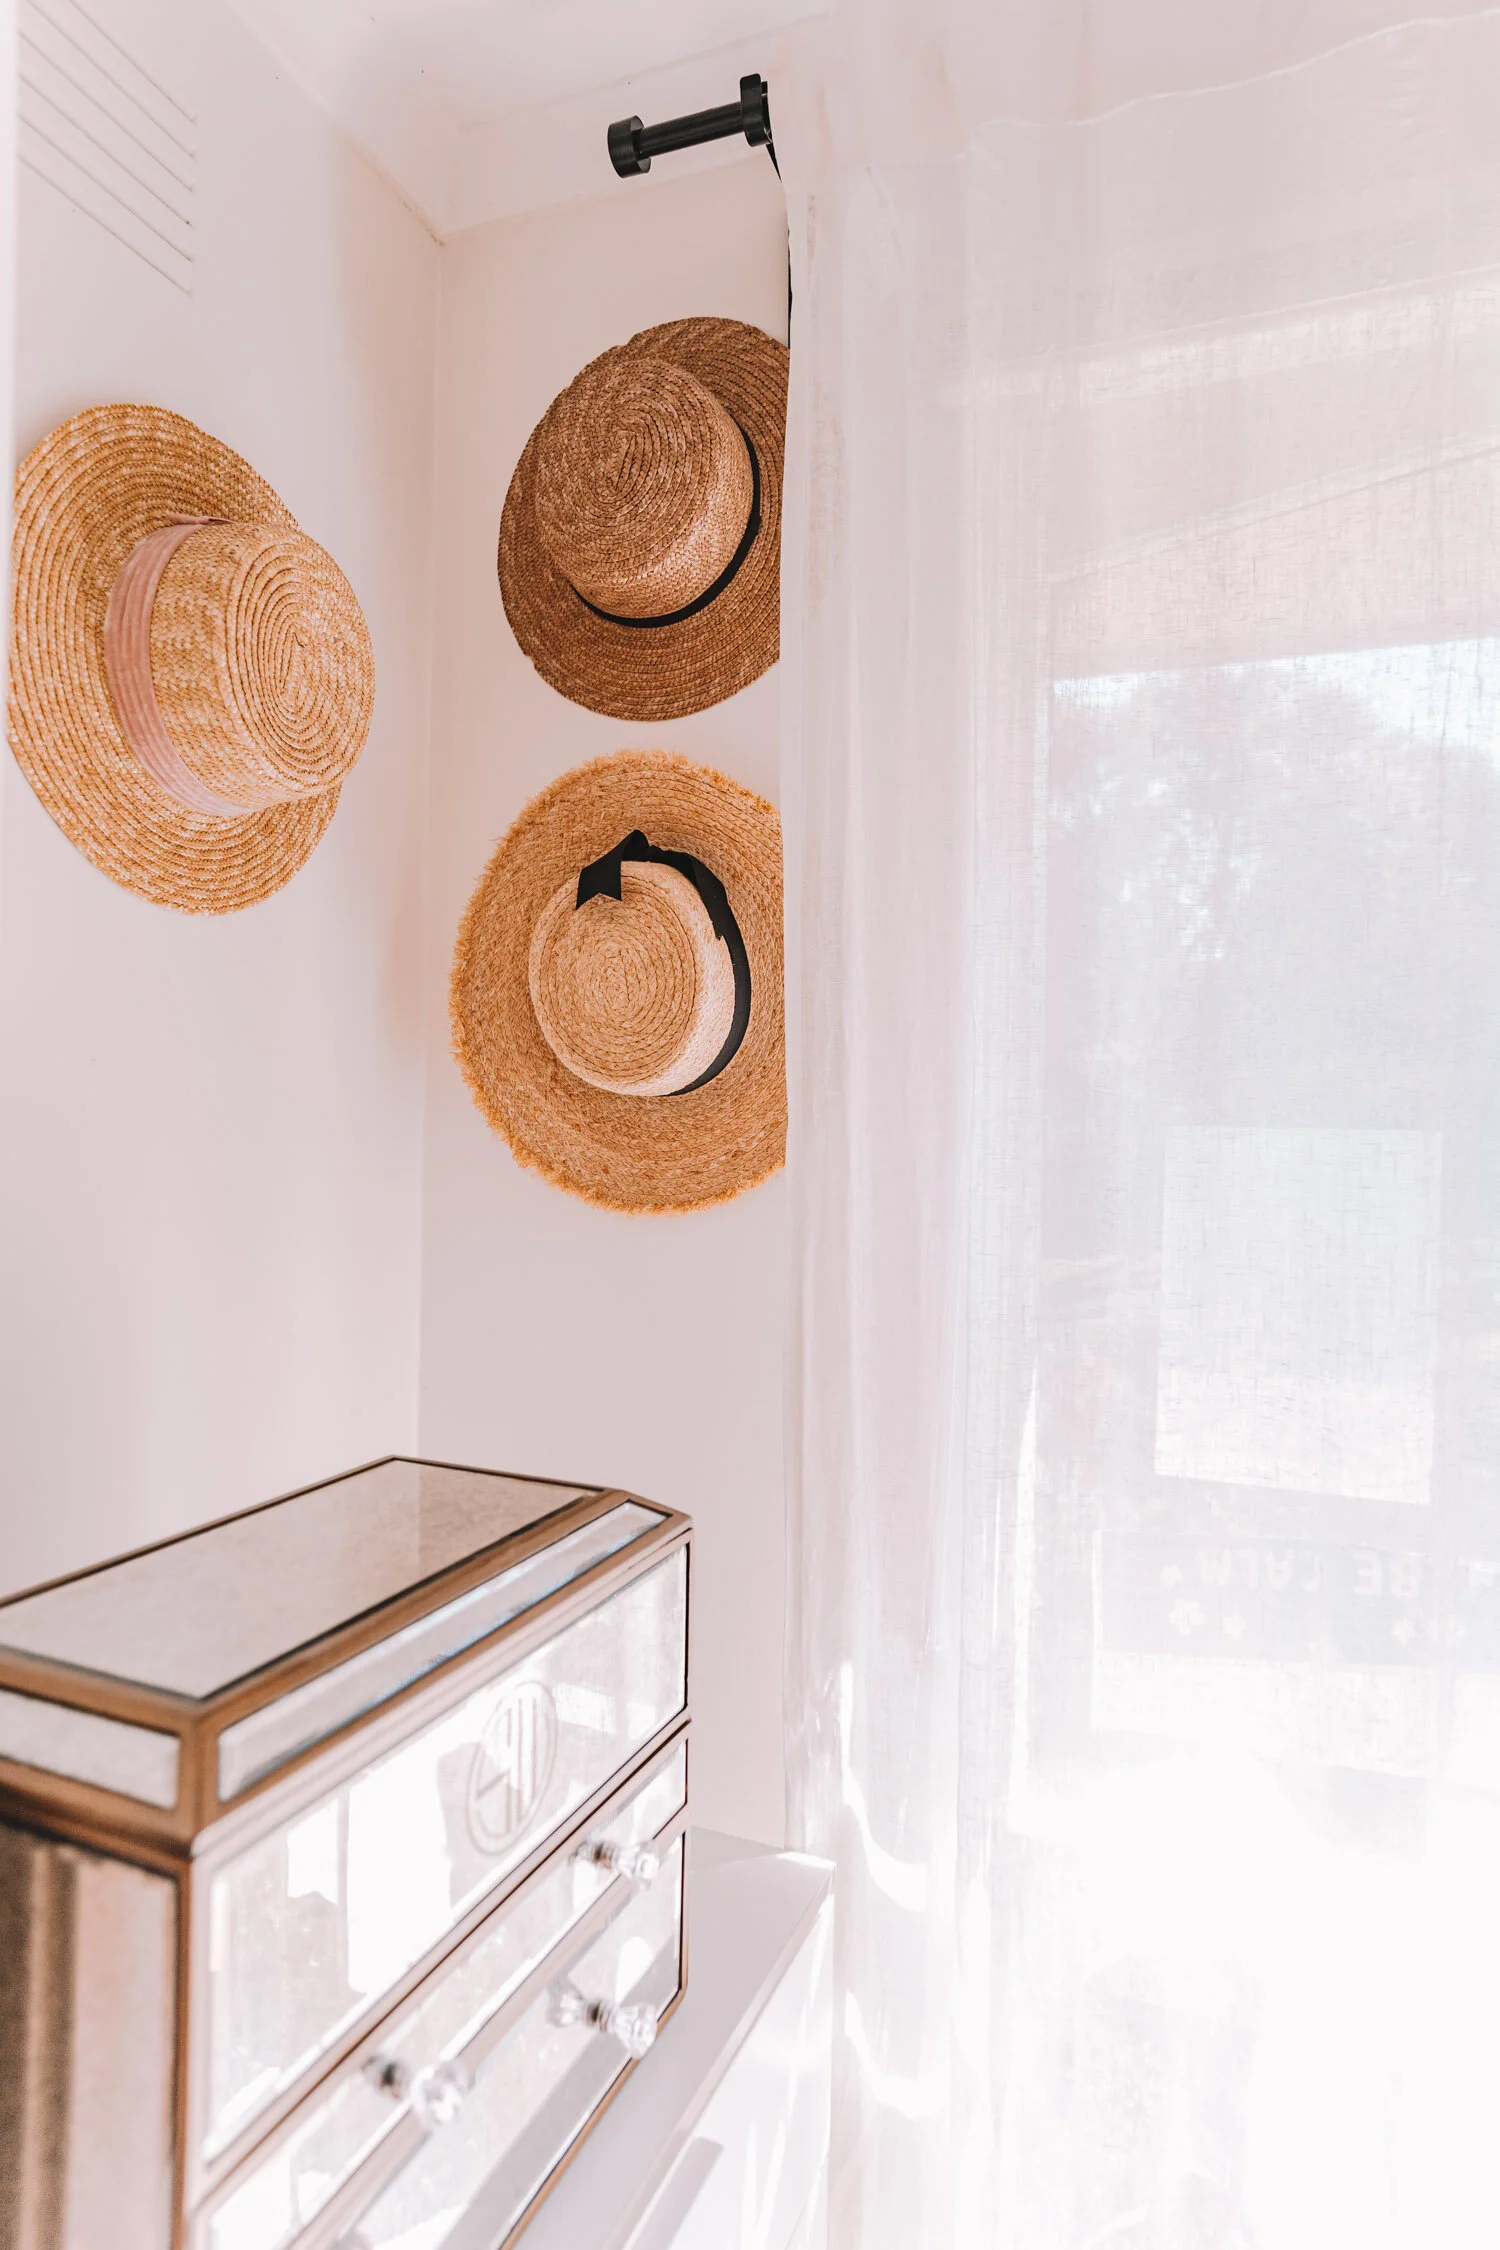
I’m super indecisive and one of the most difficult decisions I had to make was choosing the curtain rod colour. IKEA has 2 curtain rod colours (white and black) and our guest bedroom actually had white curtain rods installed. However, black curtain rods kept catching my eye whilst browsing on Pinterest and after lots of umm-ing and ahh-ing I decided to go with black, mainly because I loved how stylish they look and I don’t regret the choice one bit!
PS I hope these comparison images help because I struggled to find images to compare the two!
Choose black curtain rods if:
You want a nice contrast between the curtains and the rods. The black colour draws your eyes upwards and kind of almost makes the ceiling look higher.
You have black or dark accents in the room to draw attention to these.
You want a really nice statement and stylish look.


Choose white curtain rods if:
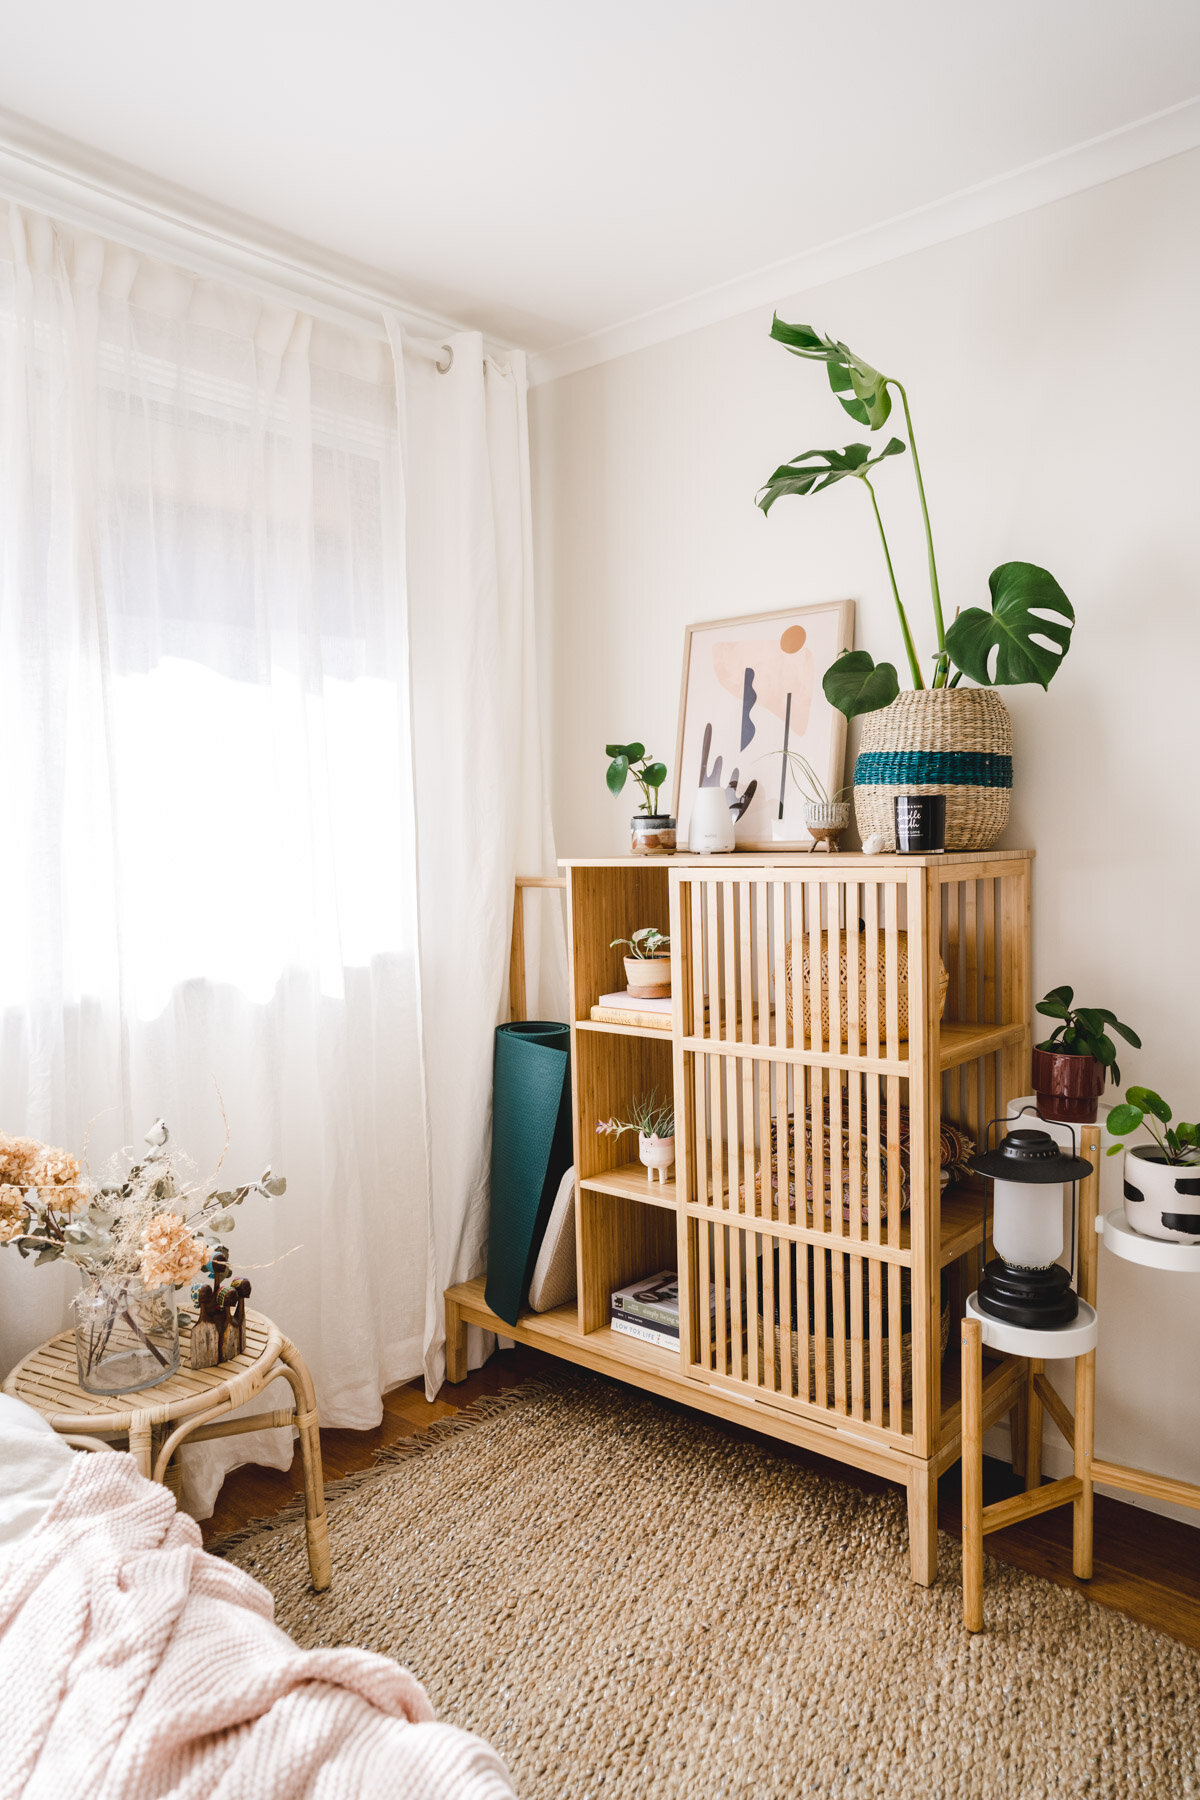
You want the curtains to blend into your wall and not be a feature item
Everything is light in the room and you don’t want to detract from this focus
You can’t decide! Because I think you definitely can’t go wrong with white, since it just blends in with white sheers and disappears into the background.

HOW TO INSTALL YOUR CURTAINS!
YOU WILL NEED (Per window):
For reference our windows measure 190cm in width and 220cm in height
1 x IKEA RÄCKA Curtain rod: The RÄCKA curtain rod is the thinner rod from the IKEA range and is good for hanging sheers, if you’re looking for rods to hang block out curtains or a thicker 2nd layer, then use the HUGAD curtain rod. Make sure when selecting your curtain rod that you select the right size! For our windows we used the 210-385 cm width rods, even though our windows are only 190cm in width, because I positioned the rods wider than the window.
2 x IKEA RAFFIG Curtain finials: These are placed at the ends of the curtain rod as a finishing element.
2 x IKEA BETYDLIG Curtain Brackets: If you want to add a 3rd in the middle you can but I found ours fine with just 2 on the side
1 x IKEA LEJONGAP Curtains: sheer white linen (each pack comes with two panels which were enough for our windows, though I’ve been toying with the idea of adding in a third panel on each window to have a more pleated look!
If screwing into plasterboard: I used these wall anchors + these appropriately sized screws to match the wall anchors as recommended by my dad - you can get both from Bunnings
If screwing into timber: timber screws - these are the ones I used
Screwdriver
Handheld drill
Step ladder
Ruler
Pencil + eraser
Level (my one is similar to this)
Stud finder (or you can go with the good old knocking technique)


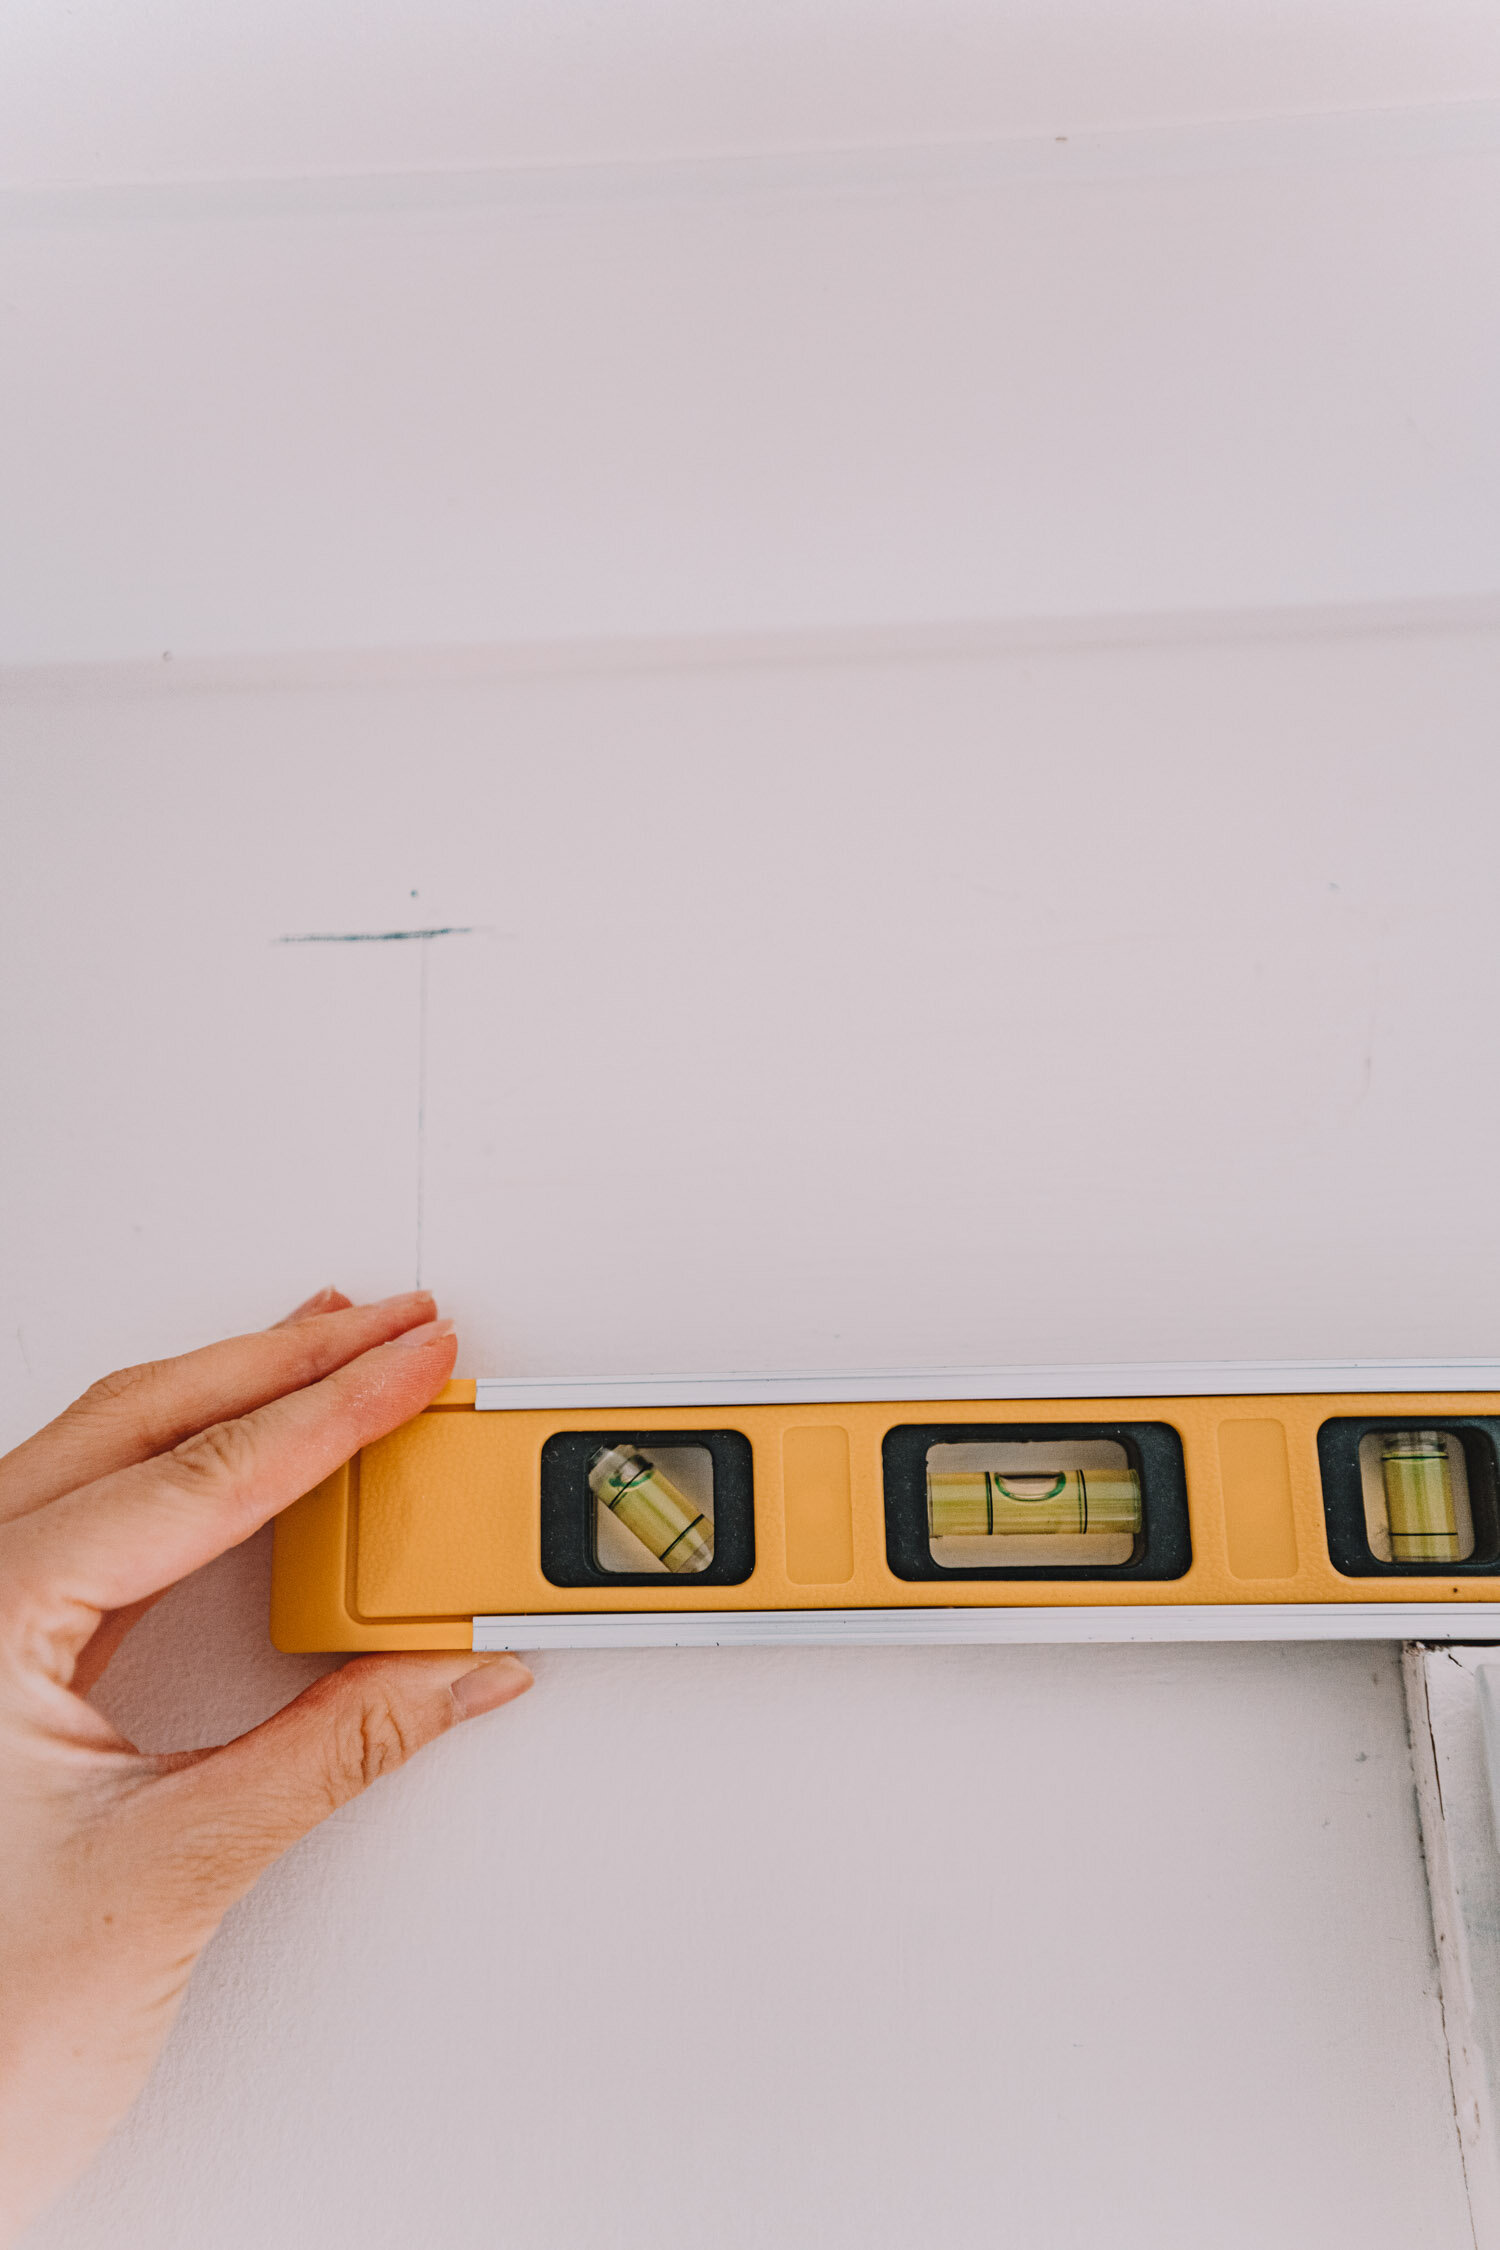
STEP 1: Positioning your Curtain Rod Brackets
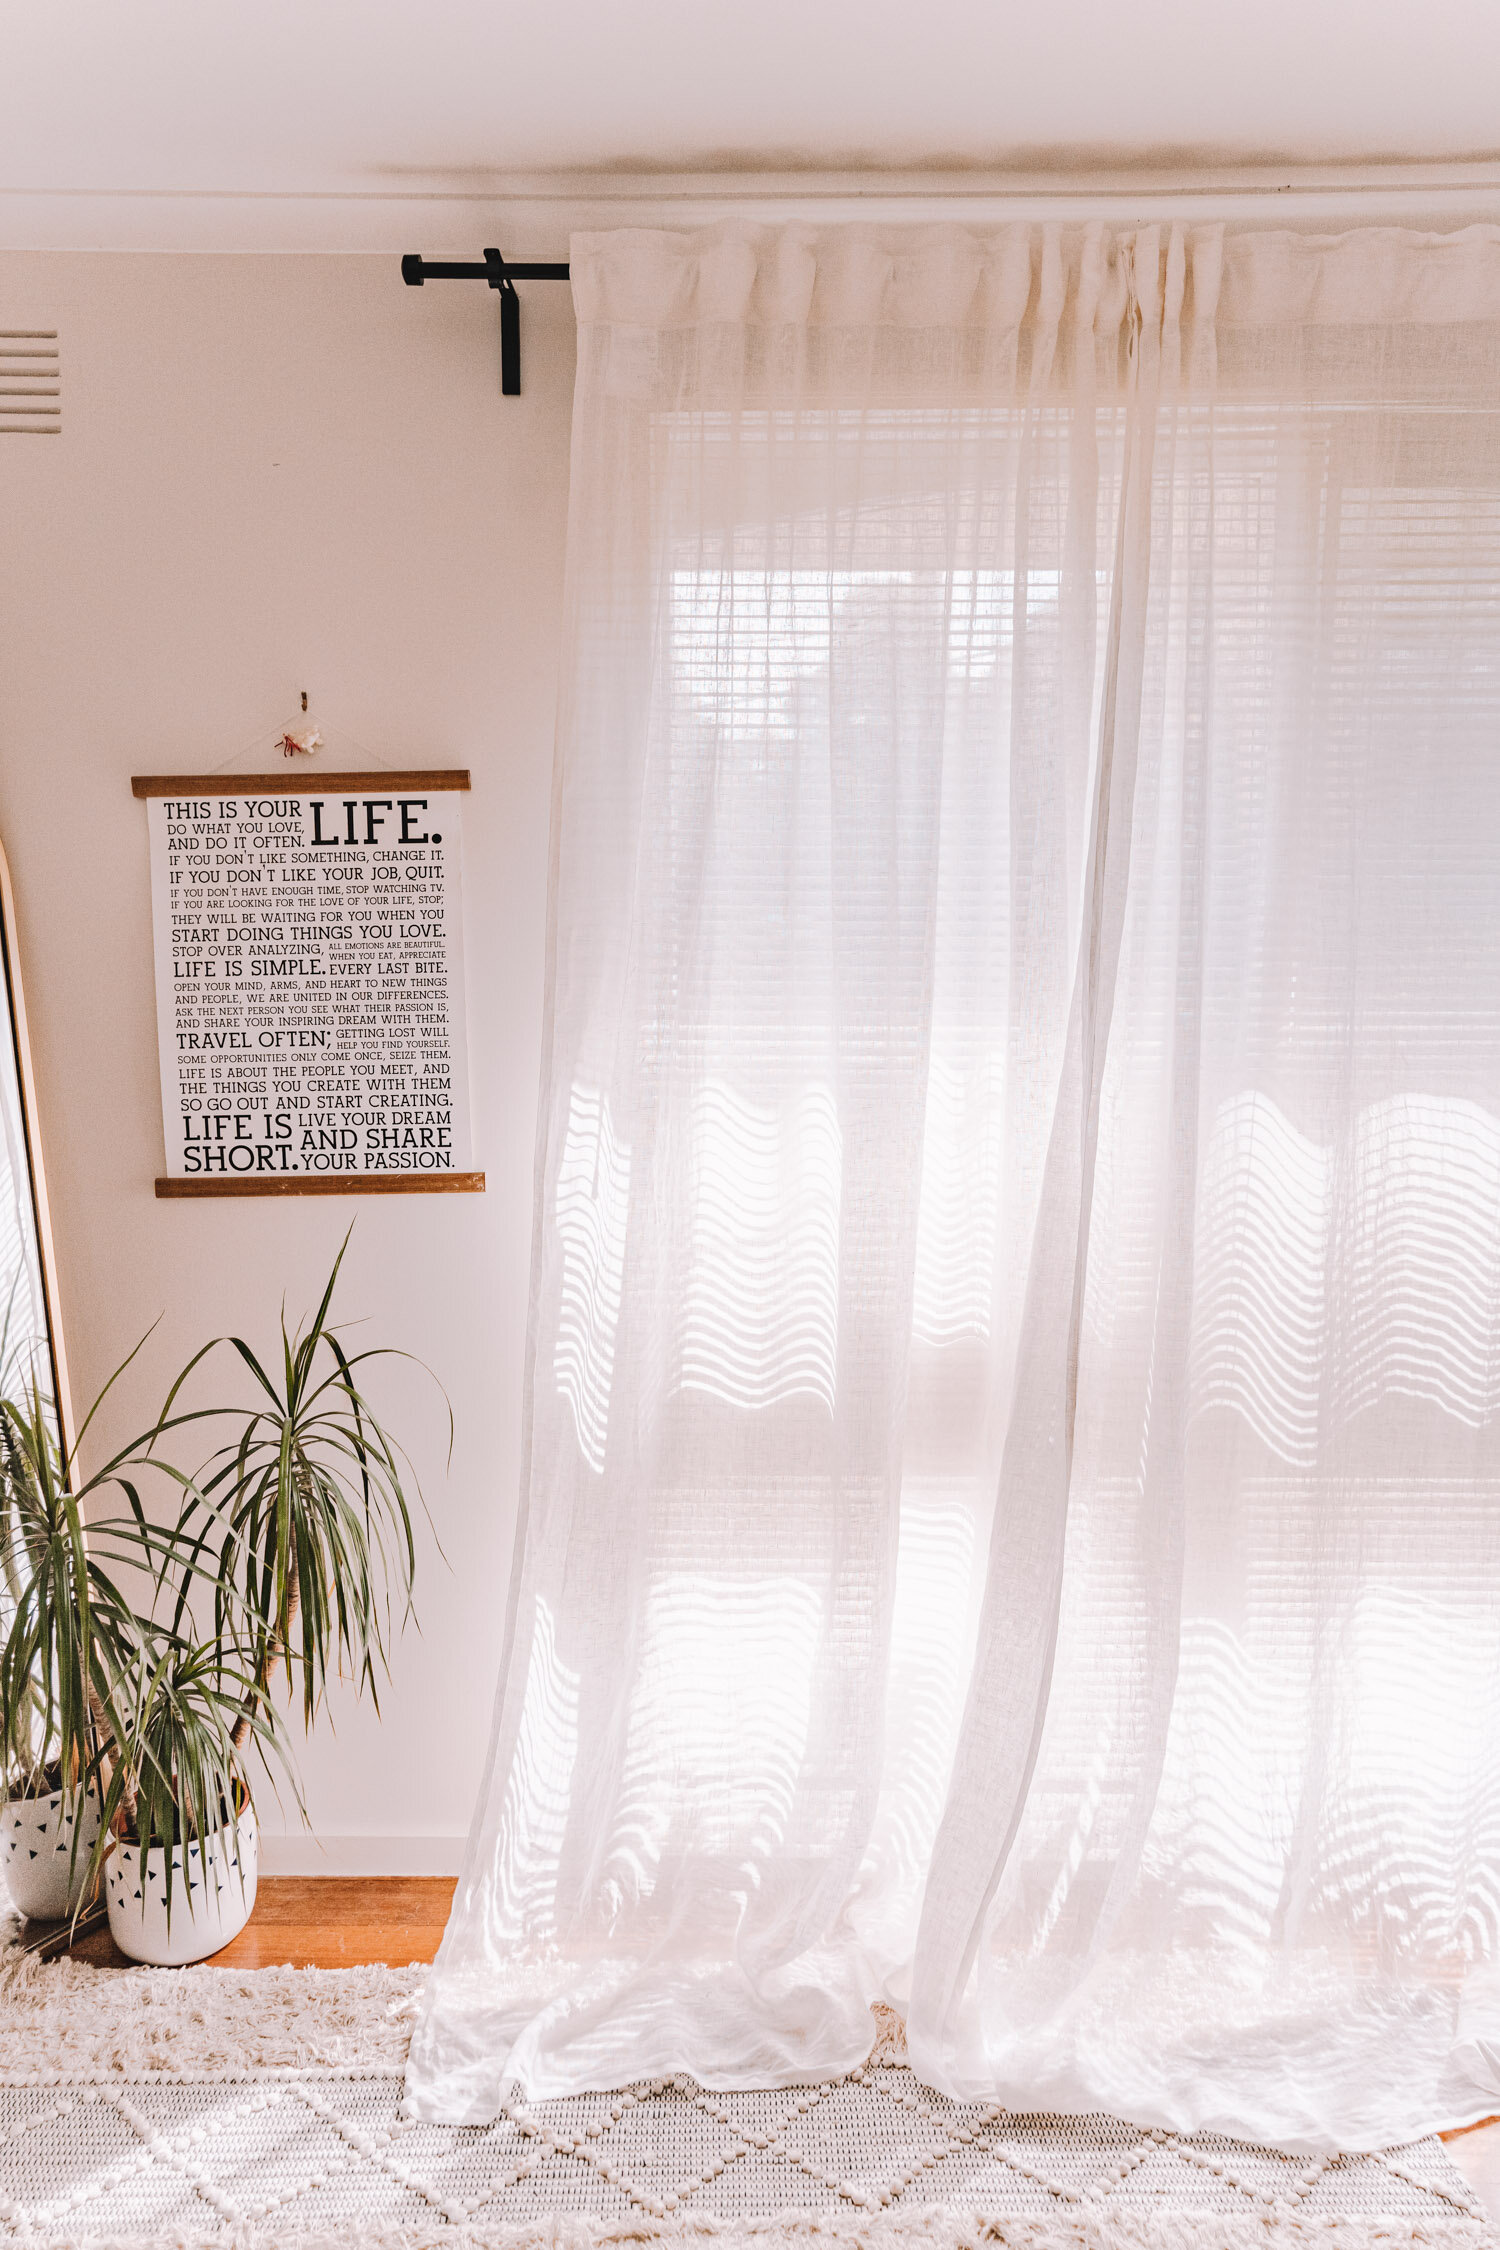
I recommend where possible, positioning your curtain rod brackets high and wide. This gives your curtains a more modern look and it makes the ceiling look taller, the room more spacious and the window look larger. Positioning your curtain rod brackets wider also gives room on the side for your curtains to hang without blocking light from the window, should you wish to draw them open.
For reference, I aimed to position my curtain rod brackets around 15 cm out from the window horizontally and 12 cm out from the window vertically. I took into account the height of our ceiling as well to make sure everything is balanced out. Also, use your stud finder to see if you can find any timber beams near where you’re thinking of positioning your curtains. If you can find one nearby, I would recommend using it as it gives the whole structure more strength. But’s okay if you can’t find any. Out of our 6 windows, 5 of our rods were done on plasterboard.
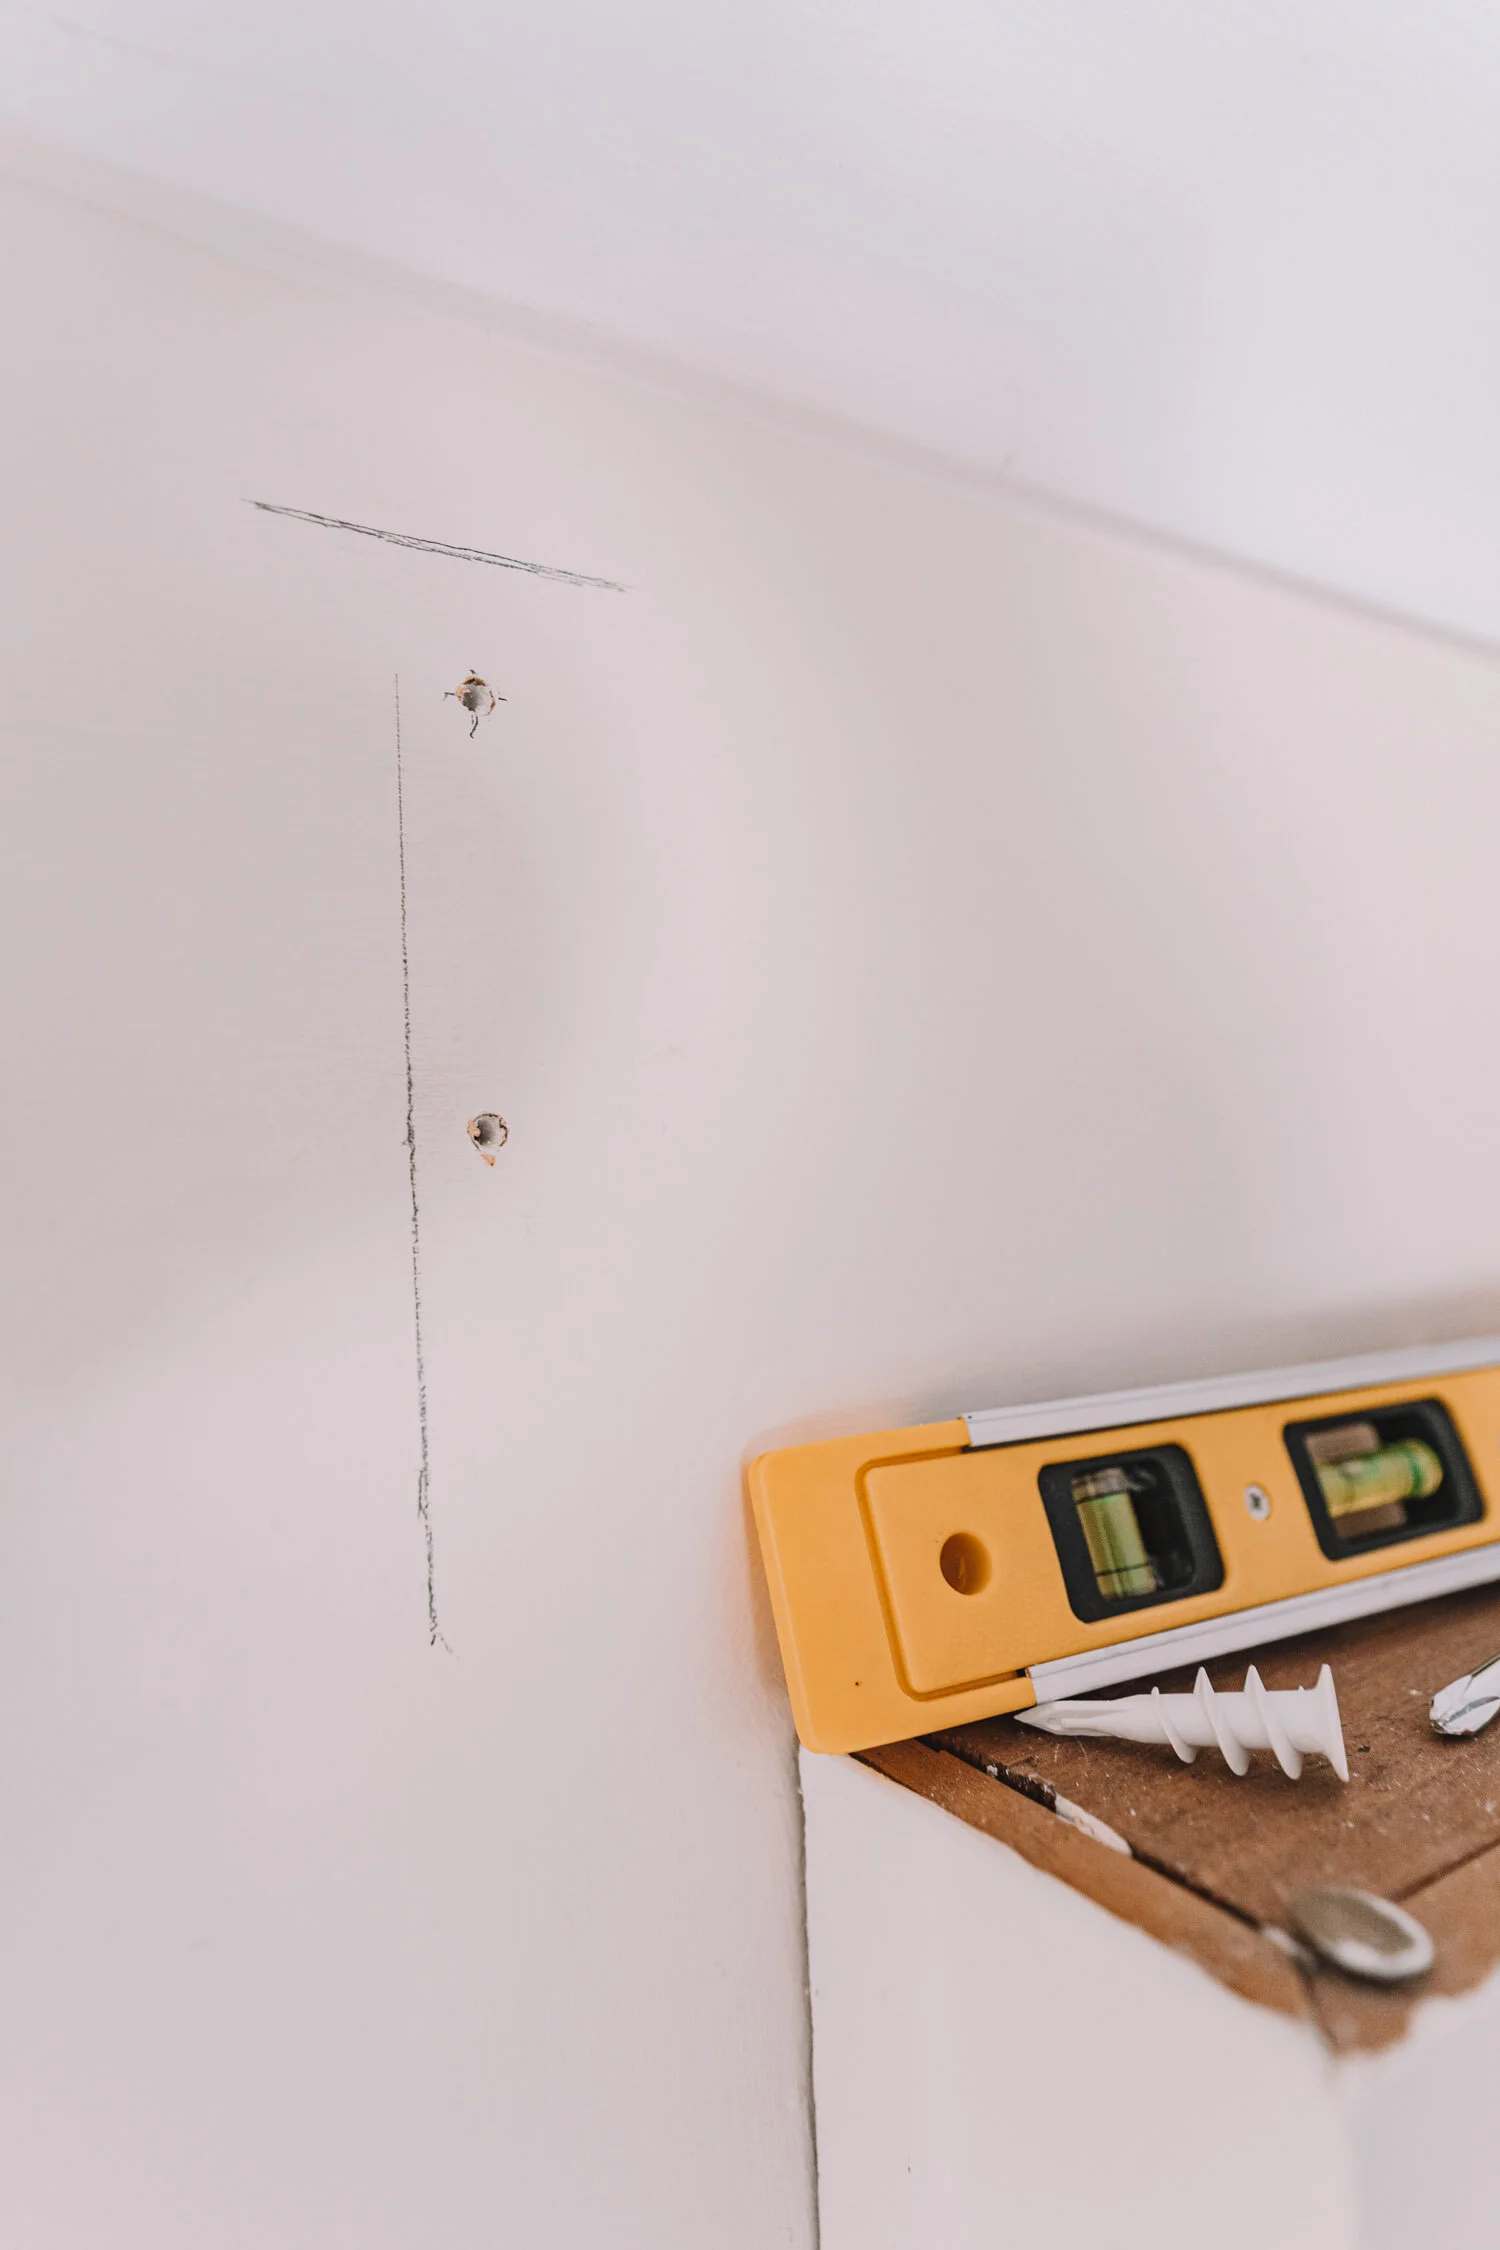
Using a your level and a pencil, make a mark on your wall as to where you plan to position your curtain rods. Then, mark out two crosses to indicate where you will be placing

STEP 2: SECURING YOUR CURTAIN ROD BRACKETS
If you are drilling onto a stud / timber beam:
Drill a pilot hole using your drill. Then, double checking the positioning of your bracket, drill the screws in.
If you are drilling into plain plasterboard:
Make a pilot hole with a drill or screwdriver (make sure to follow the instructions on your wall anchor packaging), then gently screw the wall anchor into the wall. Make sure to be super gentle because I have found if I add too much force too quickly, the wall anchor will sometimes break and you have to remove it and start again (which can be hard if you’ve drilled it completely in!) But I find if I go gently and slowly it’s less likely to break and sometimes I’ll unscrew it and rescrew it until it’s in.
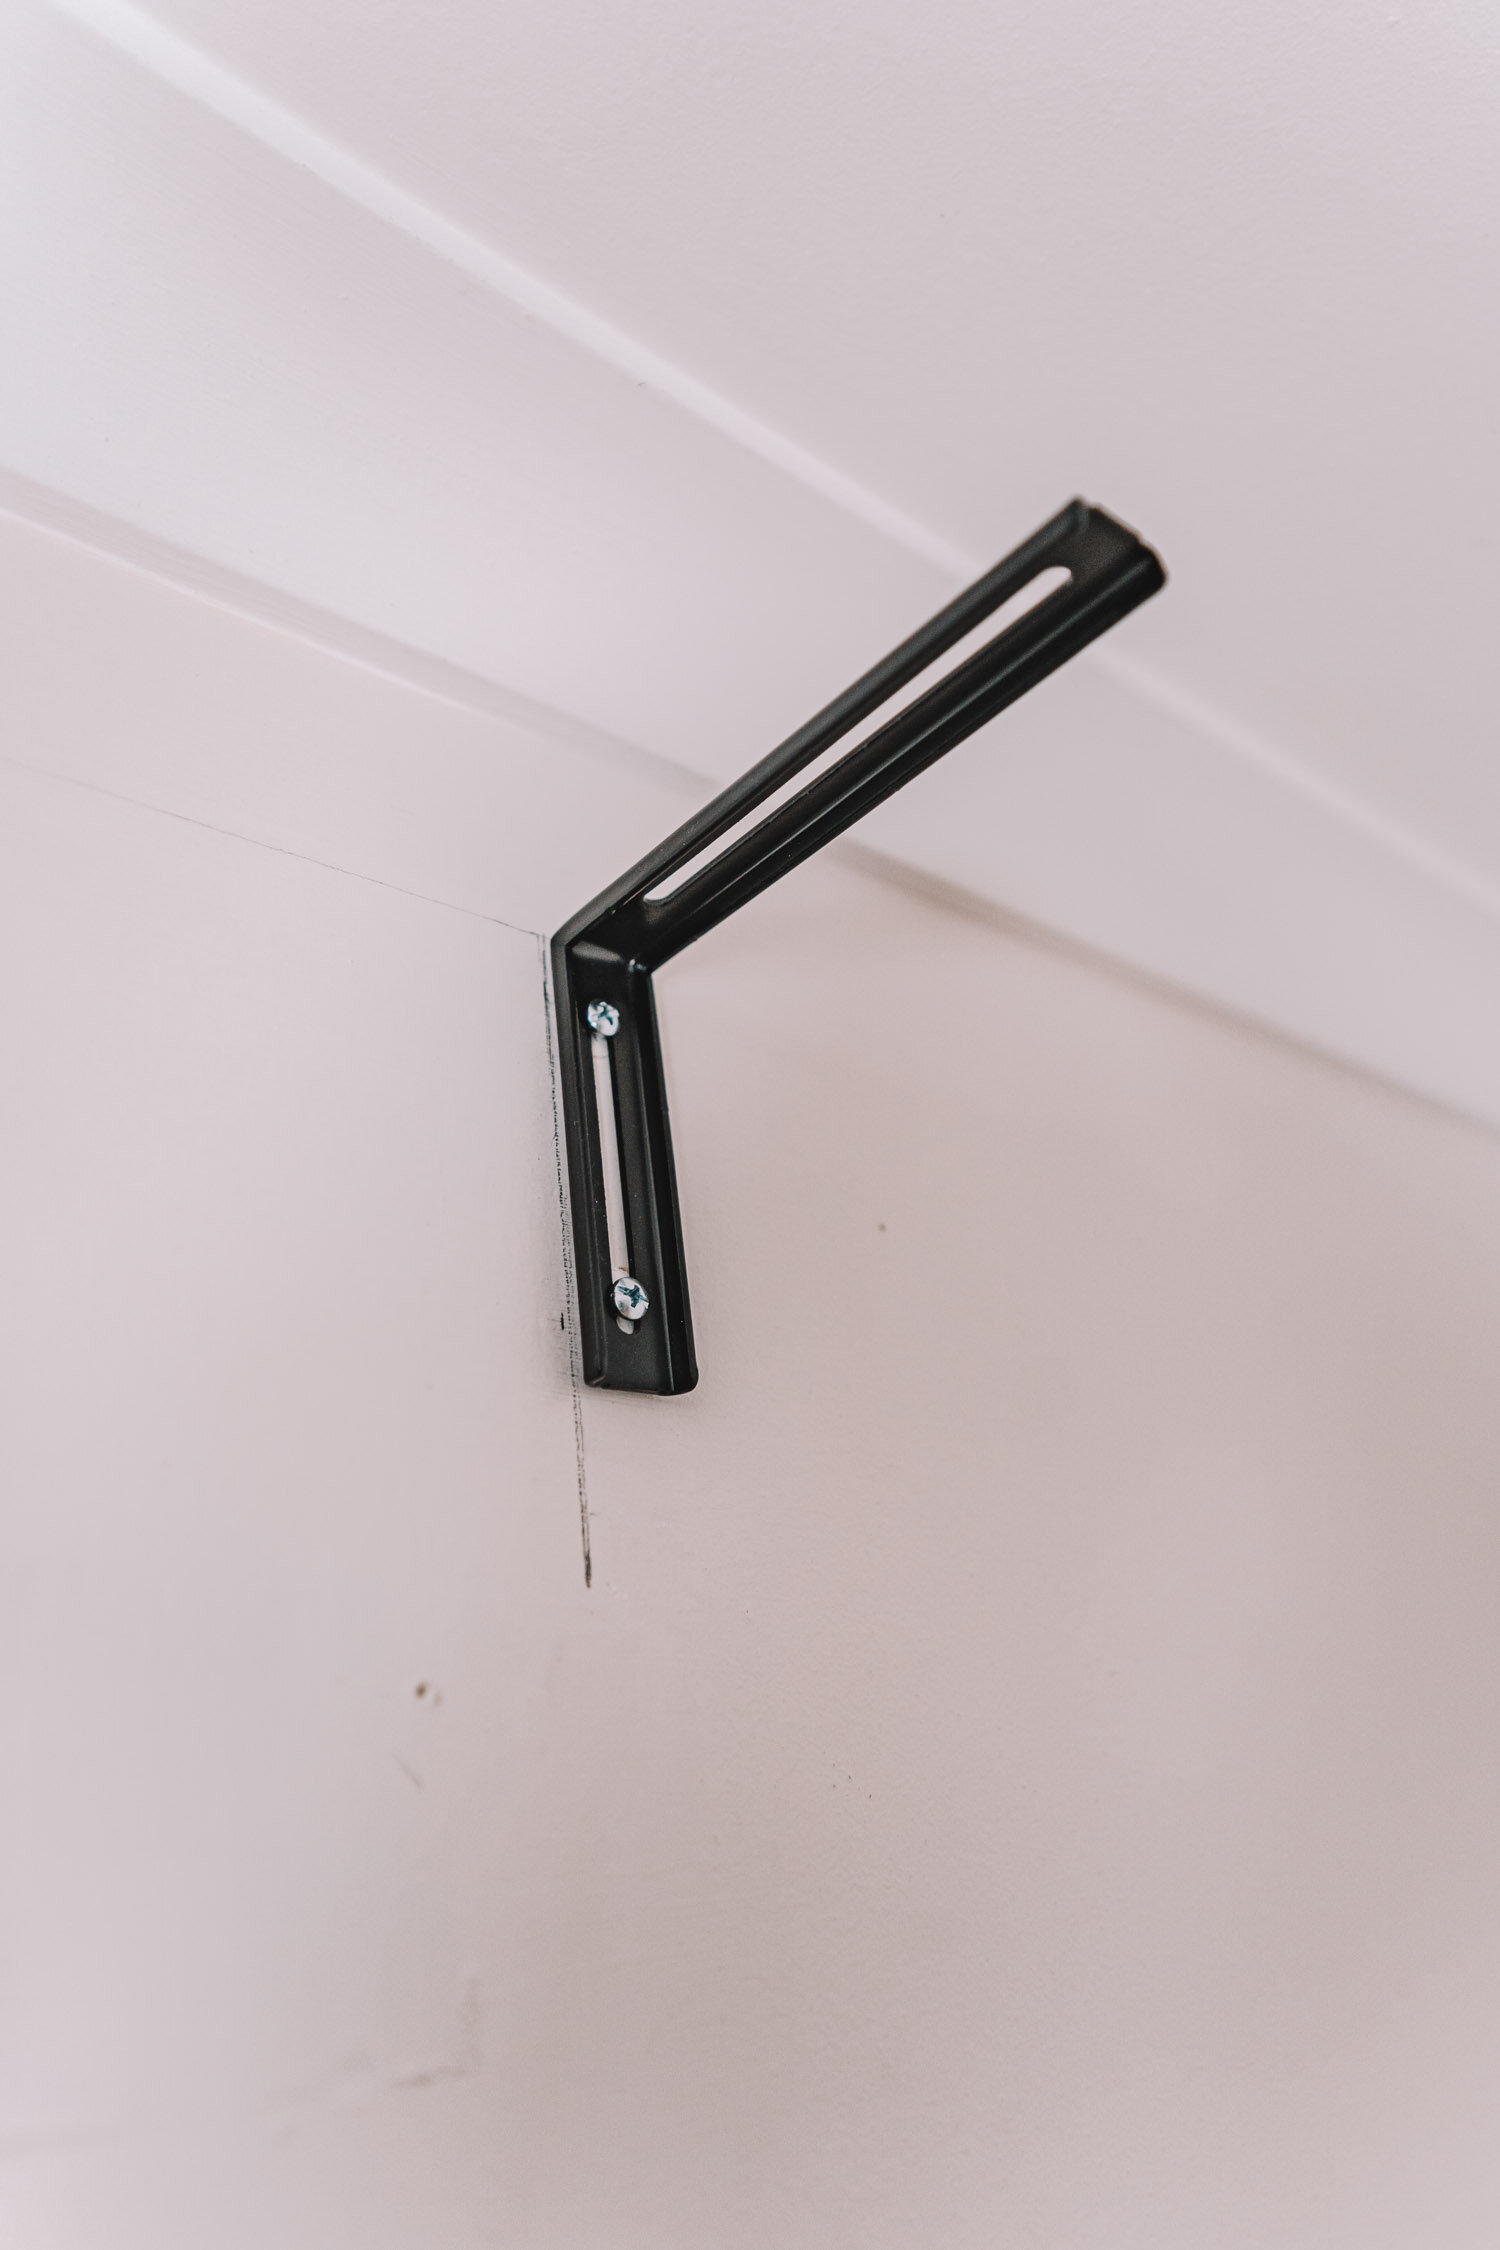
Once the wall anchor is installed, it’s back to usual - attach the bracket using a screw that fits the wall anchor.
Note: I positioned my curtain rod brackets so that the shorter side was drilled to the wall and the longer side sticks out to hold curtains as I am planning on adding a 2nd layer of block out curtains in the future soon to replace our blinds! If you want your curtain rod brackets more flush with the wall or if you’re only planning to hang sheer curtains, then drill the longer end to the wall. All the instructions are on the packaging!


STEP 3: HANGING THE curtains
Once the curtain rod brackets are in, it’s basically time to hang your curtains!
But before you hang them, be sure to pre-wash and iron/steam them. Pre-washing is important to account for any possible shrinkage.
Once you’ve washed and steamed/ironed them, thread them onto the curtain rod and hang! Be sure to also attach the finials on the end of both rods.
PS I recommend steaming/ironing them before you hang them. I did this after I hung them cuz I was too excited to get the curtains up but it was rather difficult to reach the tops (and so please ignore some of the creases at the top that I couldn’t reach - yes they’re bothering me too but I’ll fix them one day later!)

STEP 4: HEMMING/STYLING YOUR CURTAINS
If your curtains are too long, you can either leave them draped on the ground in a ‘floating’ kind of style. I think this looks gorgeous if they’re only a little bit longer and gives the room a really dreamy kind of feel. Just look below!
However, out of practicality, I decided to hem my curtains instead. With the curtains hanging, I folded the curtains up so that they were about 1cm floating from the bottom of the ground and did a simple hand-stitch to secure.


You can also opt for hemming tape but I decided to just go with a hand stitch as I wanted something more temporary that I could undo in case I wanted to or made a mistake.
At first I thought having the fold would look funny but I think it looks completely fine now and even adds a bit of a decorative feature to the bottom of the hem!
I hope you enjoyed this tutorial!
This post was a lot longer than I expected so keep an eye out for my next post where I share before & after images of each window we transformed! The difference is absolutely incredible (which is probably why I took so many pictures!) so do pop by here in a couple of days to see it all.
As mentioned before, I installed these curtain bracket rods with the longer side pointing out as whilst we’re using our sheer linen curtains with our existing blinds, I’m planning to eventually add a 2nd layer of curtains, a block out one so that we can use those instead of the blinds. These curtain brackets work great in that even if I’ve installed them this way, I can still hang a single layer of blinds by adjusting the placement of the rod holder along the bracket. So it still looks perfectly fine in the interim with just one set of curtains up as well, but I can also adjust later when I add on a 2nd layer too.